How to Integrate Wireless Thermostats with Your Underfloor Heating System in the UK
The Benefits of Wireless Thermostats
Explore the best options for your needs
Browse the available range to compare relevant products, categories, and next-step options.
Integrating wireless thermostats with your underfloor heating system provides significant benefits, enabling you to optimise comfort and energy efficiency. These devices allow for precise temperature control, which can lead to reduced heating costs and enhanced convenience.
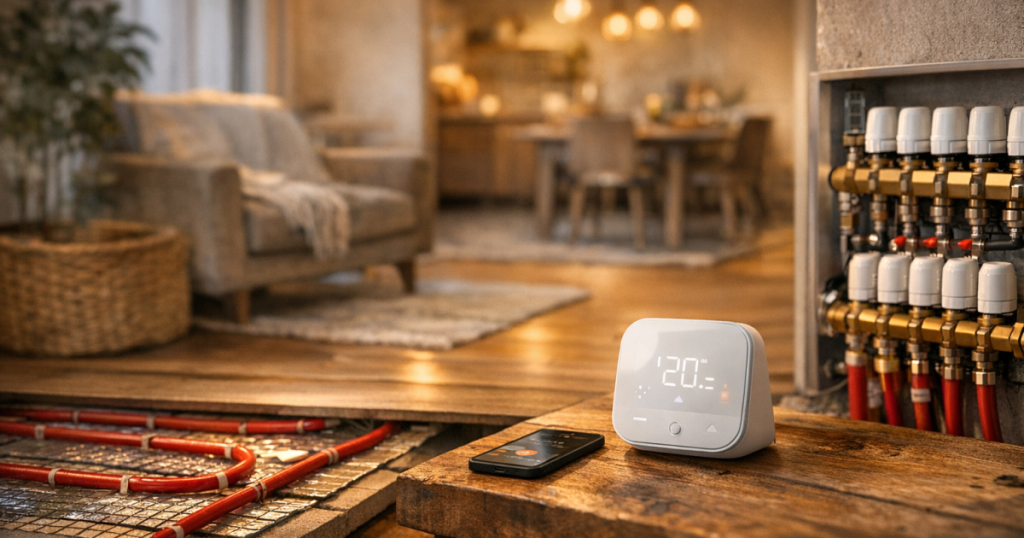
Understanding Wireless Thermostats
A wireless thermostat communicates with your underfloor heating system without the need for extensive wiring. This means installation can be simpler and more flexible, allowing you to choose locations that fit your lifestyle. Many models also come with smartphone applications, giving you the ability to adjust the heating remotely.
How Wireless Thermostats Work
Wireless thermostats use radio signals to communicate with a receiver connected to your underfloor heating system. When the thermostat detects a temperature change, it sends a signal to the receiver to adjust the heating accordingly, providing a comfortable environment efficiently.
Steps to Integrate Wireless Thermostats
Follow these straightforward steps to successfully integrate wireless thermostats with your underfloor heating system:
- Step 1: Choose the Right Wireless Thermostat
Select a thermostat that is compatible with your heating system. Look for features like smartphone connectivity, learning capabilities, and zoning options for added control. - Step 2: Gather Necessary Tools
You will typically need a screwdriver, mounting hardware, and potentially a drill. Always refer to the installation manual provided by the manufacturer. - Step 3: Turn Off Your Heating System
Safety is paramount. Ensure your heating system is switched off before commencing installation to avoid any electrical hazards. - Step 4: Install the Receiver
Mount the receiver unit according to the manufacturer’s instructions. This unit is usually connected directly to the underfloor heating system. - Step 5: Mount the Thermostat
Find a suitable location for the thermostat, ideally away from direct sunlight and drafts. Use the provided mounting hardware for installation. - Step 6: Pair the Devices
Activate the pairing mode on both the thermostat and the receiver. Follow the instructions to connect them, ensuring they communicate effectively. - Step 7: Test the System
After installation, turn on your heating system and test the thermostat to ensure it is controlling the underfloor heating as intended.
Key Considerations
When integrating wireless thermostats, keep these factors in mind:
- System Compatibility: Ensure the thermostat is designed for use with underfloor heating systems.
- Range and Signal Strength: Consider the distance between the thermostat and receiver. Obstacles like walls can affect signal strength.
- Professional Assistance: For complex setups or if you’re uncertain about compatibility, consulting with a qualified technician is advisable to ensure compliance with local regulations.
Maximising the Efficiency of Your Underfloor Heating
Once you have integrated your wireless thermostat, it’s essential to ensure your underfloor heating system operates at optimal efficiency. Consider implementing zoning to control heating in different areas, reducing energy usage without sacrificing comfort. For more details on how you can enhance the efficiency of your system, explore our guide on How to Maximise Underfloor Heating Efficiency in Small UK Homes.
The Short Version
Integrating wireless thermostats with your underfloor heating system can significantly enhance comfort and energy efficiency. Follow careful installation steps, considering compatibility and signal strength, to achieve optimal results.
Read Next
- How to Secure the Best Deals on Underfloor Heating Systems in the UK
- How to Size and Select the Right Underfloor Heating Kit for Your UK Home
- How To Install an Underfloor Heating System in a UK Home Step-by-Step