How to Install and Calibrate a Heatmiser Neoair V3 Wireless Smart Thermostat
Introduction
Explore the best options for your needs
Browse the available range to compare relevant products, categories, and next-step options.
Installing a Heatmiser Neoair V3 wireless smart thermostat is an excellent choice for those looking to enhance control over their underfloor heating system. This model is user-friendly and provides accurate temperature management, making it ideal for maintaining comfort in your home. In this guide, you’ll learn how to effectively install and calibrate your Heatmiser Neoair V3 thermostat to ensure optimal performance.
Step-by-Step Installation
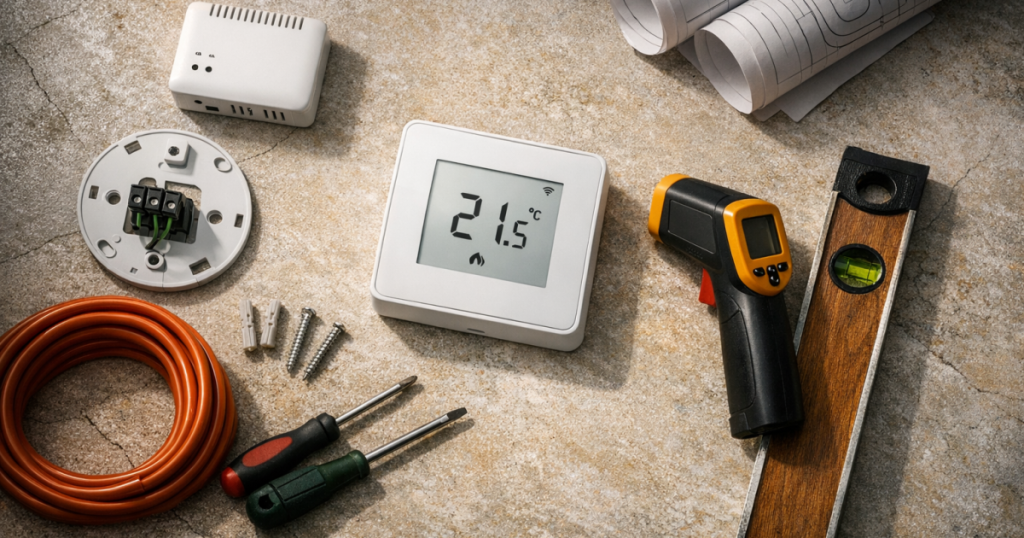
Before you begin, ensure you have all necessary tools at hand. You’ll need a screwdriver, a drill (if required), and batteries for your thermostat. Follow these steps carefully to ensure proper installation.
1. Preparing for Installation
- Identify the location where you want to mount the thermostat. It should be placed on an interior wall, away from direct sunlight, drafts, and other heat sources.
- Ensure that the wall is suitable for drilling, free of electrical wires or plumbing pipes.
2. Mounting the Thermostat Base
- Remove the front cover of the Heatmiser Neoair V3 by sliding it off gently.
- Using the mounting template provided, mark the positions for the screws on the wall.
- Punch holes where marked and secure the thermostat base to the wall using the provided screws.
3. Installing the Batteries
Insert the batteries into the thermostat according to the polarity indicators inside the battery compartment. Ensure that the batteries are new and correctly installed to avoid any functionality issues.
4. Reattaching the Front Cover
Once the base is securely attached, slide the front cover back onto the thermostat, ensuring it fits snugly.
Calibrating the Neoair V3 Thermostat
After installation, calibrating your thermostat is essential for accurate temperature control. Follow these steps to ensure proper calibration.
1. Accessing Calibration Settings
- Press and hold the “Menu” button on the thermostat until the display shows the settings menu.
- Navigate to the “Calibration” option using the arrow buttons.
2. Adjusting Temperature Calibration
Use the up and down arrows to adjust the temperature calibration. This should be set to match the true temperature of your environment. A reliable method to verify this is by using a separate thermometer placed near the thermostat for reference.
3. Saving Your Settings
- Once you’ve made the adjustments, press the “OK” button to save your settings.
- Exit the menu by pressing the “Menu” button again.
Who This Installation Suits
The Heatmiser Neoair V3 thermostat is suited for homeowners looking for a seamless integration with their underfloor heating systems. It’s ideal for those wanting the convenience of wireless control and enhanced energy efficiency throughout their homes.
Common Mistakes to Avoid
- Incorrect Placement: Failing to place the thermostat in a suitable location can lead to inaccurate temperature readings.
- Overlooking Calibration: Neglecting to calibrate the thermostat can result in inefficient heating and increased energy costs.
- Improper Battery Installation: Always check battery installation to prevent malfunctioning.
Next Steps
Once installed and calibrated, monitor the thermostat’s performance over the next few days. Ensure it accurately reflects the room temperature and adjusts heating accordingly. If any issues arise, refer to the troubleshooting section to resolve common problems.
Further Reading
- Essential Guide to Maintaining and Cleaning Magnetic Central Heating Filters in Underfloor Systems
- How to Compare Underfloor Heating Manifolds for Best Performance and Cost
- How to Troubleshoot Common Issues with Underfloor Heating Manifolds