How to Inspect and Test Your Underfloor Heating System Before Final Installation
The Importance of Inspecting and Testing Your Underfloor Heating System
Before installing your underfloor heating system, it’s crucial to inspect and test it properly. This step ensures that everything is functioning as expected and can help avoid costly repairs later. A well-tested system not only enhances warmth but also ensures energy efficiency.
Key Inspection Steps
Follow these steps to inspect your underfloor heating system effectively:
Explore relevant products and categories
Browse the most relevant category and product options for this guide.


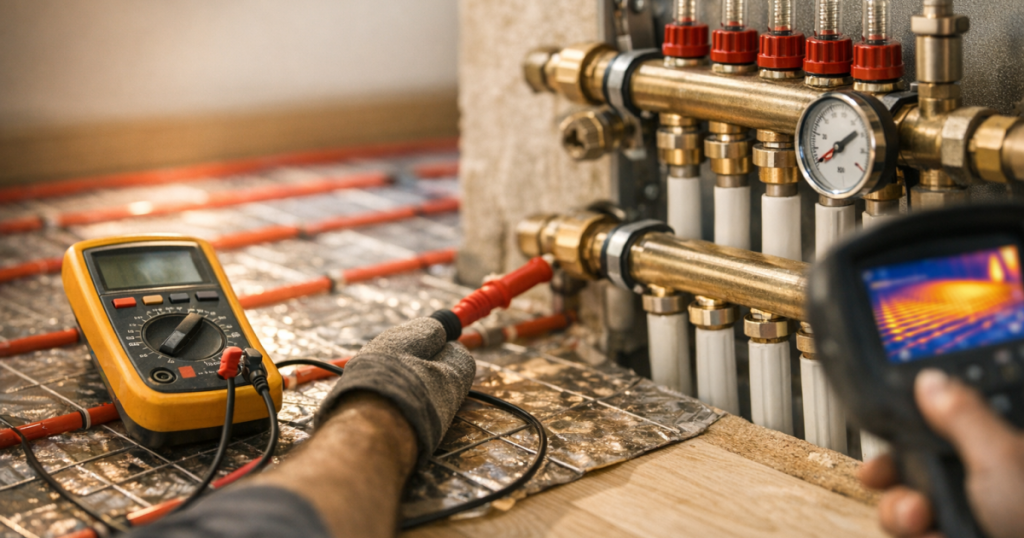
- Visual Check: Begin by inspecting all components, including pipes, pumps, and electrical elements, for any visible damage.
- Flow Rate Test: Ensure the system can deliver the proper flow rate. This can be checked by running the system for a short period and evaluating the output.
- Leak Test: Perform a leak test by pressurising the system with water and monitoring for any drops in pressure over a period of time.
- Electrical Checks: If your system integrates electrical components, check the wiring and connections for any signs of wear or incorrect installation.
Testing Procedures
After completing the inspections, carry out the following testing procedures:
- Thermal Test: Heat the system and measure the temperature at various points to ensure consistent warmth throughout.
- Water Pressure Test: Conduct this test to confirm the system operates within the recommended pressure ranges.
Verifying Compatibility with Floor Types
Different floor types can affect the performance of an underfloor heating system. Testing should always consider the final floor material. For example, some systems may work better under tiles compared to wooden floors, which may require specific adjustments. For more details, check out how to choose the best underfloor heating system for different floor types.
Avoid Common Mistakes
While working through inspections and tests, here are some mistakes to watch out for:
- Skipping Visual Inspections: Always perform a thorough visual inspection before moving on to testing.
- Ignoring Manufacturer Guidelines: Testing procedures can vary; ensure you adhere to specific manufacturer guidelines.
- Overlooking Floor Types: Failing to verify the compatibility of the heating system with various floor materials can lead to inefficient heating solutions.
Next Steps After Testing
Once you’ve inspected and tested your system, it’s time to plan the installation. Make sure to document your findings and address any issues before proceeding. Detailed planning can make all the difference, so consider how to plan the layout for efficient underfloor heating installation.
Conclusion
Properly inspecting and testing your underfloor heating system is vital for achieving optimal performance. Make sure that all components are functioning efficiently before installation. Should you encounter issues or uncertainties, do not hesitate to reach out for professional guidance.
Related reading
- How to Calculate the Right Underfloor Heating Size and Output for Your UK Home
- Common Installation Challenges with Underfloor Heating and How to Solve Them
- How To Install an Underfloor Heating System in a UK Home Step-by-Step