Best Practices for Underfloor Heating Installation Steps
Understanding the Importance of Proper Installation
Efficient and comfortable heating is crucial in any home, and underfloor heating provides a unique solution. When correctly installed, it distributes warmth evenly across a room, enhancing comfort and energy efficiency. However, following the correct underfloor heating installation steps is paramount to achieve these benefits.
Preparing the Space
The first phase involves preparing the space for installation. This includes:
- Clearing the Area: Remove furniture, carpets, and other items from the installation zone.
- Inspection: Ensure the subfloor is dry, clean, and level. Any blemishes can affect the heating’s efficiency.
- Measuring: Determine the area to be heated. Accurate measurements ensure you purchase the correct amount of materials.
Selecting the Right System
Selecting an appropriate underfloor heating system is also vital. Factors to consider include:
- Type of System: Decide between electric or water-based systems. Electric systems can be easier to install, while water systems are typically more efficient for larger areas.
- Insulation: Make sure to use adequate insulation boards to avoid unnecessary heat loss and improve efficiency.
- Component Quality: Opt for quality components to ensure durability and sustained performance. Familiarise yourself with all underfloor heating components involved.
Installation Steps
Once the preparations are complete and the system is selected, carefully follow these installation steps:
1. Lay Insulation Boards
Start by laying insulation boards on the floor. These boards will prevent heat from escaping downwards into the subfloor, improving overall efficiency.
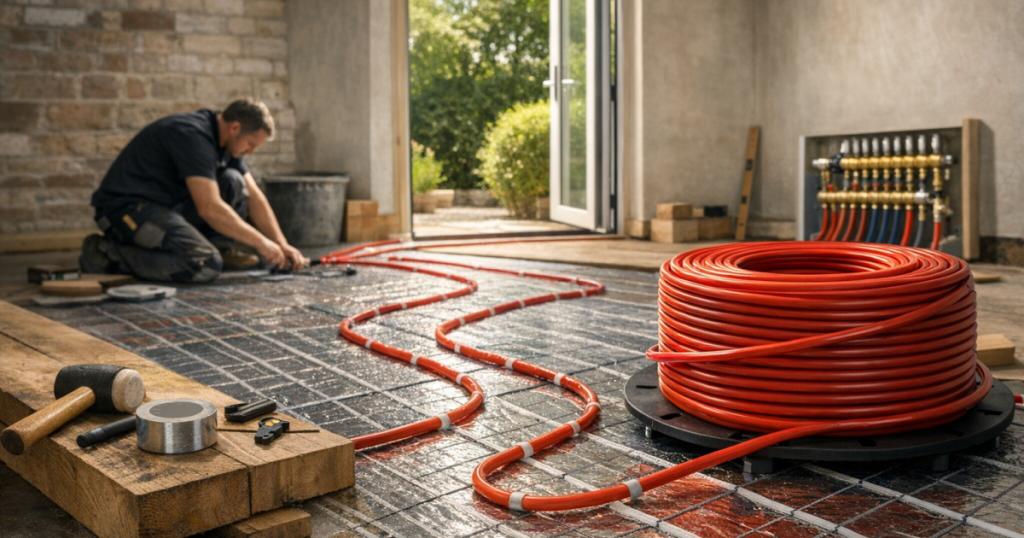
2. Position the Heating Elements
For electric systems, lay the heating cables or mats according to the manufacturer’s instructions. For water-based systems, install the pipes ensuring they are evenly spaced. Always refer to the guidelines specific to your system for optimal placement.
3. Connect the System
Ensure all connections are secure, particularly for water-based systems. Electric systems typically require connection to a thermostat or control panel.
4. Pour the Screed
If using a wet system, pour the screed over the heating elements, covering them completely. This step is crucial for efficiency, as the screed acts as a heat distributor. Allow sufficient time for the screed to cure fully before proceeding.
5. Test the System
After installation, conduct a test of the underfloor heating system. Ensure it functions correctly before proceeding with floor finishing or covering.
Final Checks and Floor Finishing
Once you’re satisfied with the installation, conduct final checks:
- Verify all elements are functioning as intended.
- Ensure there are no leaks in water-based systems.
- Allow the installed system to settle before applying flooring.
Selecting the right flooring is essential as some materials are more compatible with underfloor heating. Consult installation types for insight on suitable finishes.
Maintaining Your Underfloor Heating System
Proper maintenance extends the system’s life and maintains efficiency. Regularly check for leaks and have a professional inspect the system at least once every few years.
Where to Source Your Underfloor Heating Kit
For purchasing quality underfloor heating systems and components, consider checking out our underfloor heating store. You can find comprehensive kits tailored for various settings, ensuring a successful installation.
Explore Next
- Essential Considerations When Choosing Underfloor Heating Systems
- Best Underfloor Heating Accessories for Efficient Installation
- Understanding Underfloor Heating Controls and Their Features
For further advice or queries, feel free to contact us. Proper planning and execution will ensure that your underfloor heating system serves you well for years to come.
During the installation process, one critical aspect to bear in mind is the importance of following manufacturer guidelines meticulously. Each system can have its unique requirements based on design and materials used. For instance, while electric systems may allow for more flexible placement, water-based systems necessitate precise spacing between pipes to ensure even heating and avoid cold spots. Taking meticulous notes during installation can also aid in troubleshooting any issues that may arise in the future, providing valuable reference points.
Moreover, when connecting your underfloor heating system, consider using self-levelling compound if you are layering under a screed. This can help create an even surface and enhance the efficiency of the heating elements. The compound can also help to protect the installations beneath, particularly in the case of electric mats, as they need to be well-embedded to function optimally. It’s advisable to check the curing times of these materials before applying any flooring on top, as rushing this can cause long-term issues.
Integration with smart home technology is another trend gaining momentum. Many modern underfloor heating systems now offer compatibility with smart thermostats or home automation systems. This means you can programme your heating for different times of the day, potentially saving on energy costs and enhancing comfort. You can set schedules to warm your home in advance of your arrival, ensuring that you arrive to a warm space without unnecessary energy expenditure when you’re not at home.
- Consider Using a Professional: If in doubt during any part of the installation, do not hesitate to seek professional assistance. This can lead to greater peace of mind as professionals are well-versed in the intricacies of the installation process.
- Document Your Work: Take photos during the installation to document your work, which can serve as a helpful reference should you need to troubleshoot or inform future modifications.
- Seasonal Checks: In addition to regular maintenance, conduct seasonal checks, especially before winter, to ensure your system is functioning optimally.